Tuesday 30 March 2010

Robot Rendering: Final Stage

Here it is mwahahaha! The final render of my robot, after many hours spent on this project. I'm quite happy with the way it turned out. It could have been better but it's the 1st time afterall I got to use maya for modelling/rendering, and first time rigging ever(4h on it and bit of issues on the fingers and the arms but you can't tell from the pictures so it's ok :P). Again, you can click on the pictures to enlarge ;).


Before smoothing


After smoothing. The bump map on the legs and arms came out too strong so I had to turn it down and the shadow didn't look right either.


Final render. Could have been a better view and background but when I tried to change them Maya kept crashing :(... Anyway, looks good to me :D


Feel free to comment/critic :D.

Next time some characters model sheets for my next assessment ;). Cya!

Wednesday 24 March 2010

Robot Modelisation: Walk Through

Hey! I've been working non-stop on this project lately. Here are some pictures of my model at different stages of the process, from the modelling to the lighting/scene set up and even a bit of texturing. They are low poly so it doesn't look too good :P, I won't smooth it out before the actual final render(some pictures next week hopefully). You can click on the images to see them bigger(except the 1st one for some reasons...).


Start off with a box for the hips, shape it following the character model sheet.


Same for the torso, the spine and the legs are tube extruded, the others shapes are mostly spheres.


A leg :P.


It's getting there, the arm is almost the same shape as the leg, I could have save up some time by planning this out and duplicate the leg before extruding but didn't think about it unfortunately. Good exercise though :).


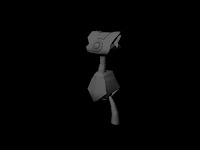
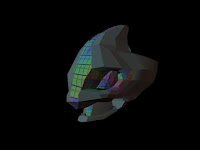
The head, hardest part to model.


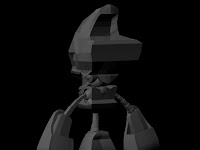
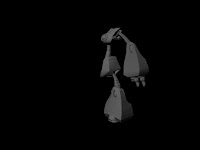
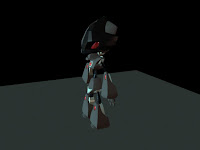
Details from the back, almost done now just a couple of really small pieces missing like the back of the head and the neck.


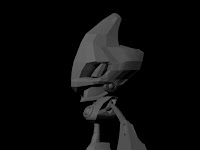
Lighting test and texturing of parts that don't need UVmapping. Mostly to see how the materials reacts with lights even though it's not smooth yet, it gives a pretty good idea of what to expect.


UV Mapping, beginning :(. Even though it's highly time consuming and a bit of a pain, I kinda like it. It's like a puzzle where you need to put the pieces back together :P.


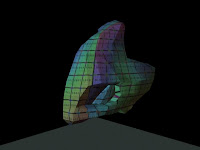
The whole head mapped, not really neat though, could have done better ^^".


Import of the textures made in photoshop out of the UV map. 3 shaders: Diffuse, Bump and Specular. Bump and Diffuse were quite easy since it's a flat color with a metal texture on the top of it i'm gonna be using for it. The spec map required a bit more of thinking.


And that's it for today! I've done the texturing of most of the model by now, just got the shoes and the fingers left. Then comes the posing and then the rendering(with some HDRI , can't wait to finish it :D).

See you next week~

Tuesday 16 March 2010

Robot Design Step 2: Poses and Textures

I'm back with more robots hehehe. Actually the same one but in different versions, looking at textures, how highlights and shadows are cast on it. About 10 hours of research for poses/sketching/tracing off/coloring. The deadline was today so I had to rush a bit to get it done in time and didn't to get as much details as I wanted to but I'm still quite satisfy with the end result:


(click it to enlarge, it's a jpeg not great quality but you can see more details)

The black one came out really nice, so far that's the one I like the most in terms of poses and colors(the colors from the character model sheet weren't too bad as well) so that's the one I'm going with. The objective is to get my 3d model as close to it as possible. The 3d model is due next week so I'll upload it up once I'm done with some shots of the WIP. Cya then!

Wednesday 10 March 2010

Character Model Sheet: Robot

Almost a month since my last post, about time to add something new :).

I've been working on this for the last couple of weeks, it's part of one of my first assessments this semester. It consists in designing a robot and make it in 3d while trying to stay as close to the design as possible.

I tried to design a cute robot for this one but as I started to add details, the head wouldn't match with the body anymore. So after a huge amount of drawings and a lot of inspiration from this :P, I got to this point:
Lined up in Flash and trace off all nice and clean hehehe:


HYDRAULIX is the name of the fake company given to us in the assessment brief.
It's low-rez ,doesn't have any highlights or shadow and the perspective is a bit off on the front view but there is the basic shape of the model+the colors. This is more than enough to take it to the next step: 3D modelling.

I've already started modelling(using Maya this year, so far I like it better than 3ds Max) but more on that next time!